In the digital age, content creation has become a cornerstone of online presence, whether you’re a blogger, marketer, or hobbyist sharing your passions. Platforms like UploadBlog.com have revolutionized how we publish and share information, making it accessible for anyone to build an audience. But to truly stand out, you need to upload content like a pro on the uploadblog.com page. This means going beyond basic uploads—it’s about optimizing every step for maximum impact, engagement, and visibility.
UploadBlog.com is a user-friendly blogging platform designed for creators who want seamless integration of text, images, videos, and more. With its intuitive interface, it caters to beginners and experts alike. However, mastering the uploadblog.com page requires understanding its features deeply. In this comprehensive guide, we’ll walk you through the process step by step, from account setup to advanced optimization techniques. By the end, you’ll be equipped to handle uploads professionally, ensuring your content not only reaches but resonates with your target audience.
Why focus on professional uploading? In a sea of content, poorly uploaded posts can get lost. Pros know how to leverage tools on the uploadblog.com page to enhance SEO, improve load times, and boost shares. Whether you’re writing tutorials, reviews, or personal stories, these strategies will elevate your game. Let’s dive in.
Setting Up Your Account on UploadBlog.com
Before you can upload anything, a solid foundation is key. Start by visiting the uploadblog.com page and clicking on the “Sign Up” button. You’ll need to provide an email address, create a username, and set a strong password. UploadBlog.com emphasizes security, so enable two-factor authentication right away for added protection.
Once registered, customize your profile. Add a bio that reflects your niche—say, if you’re into tech reviews, mention your expertise. Upload a professional profile picture and header image to make your page visually appealing. This setup isn’t just cosmetic; it influences how visitors perceive your content on the uploadblog.com page.
Next, explore account settings. Adjust privacy options if you want drafts private before publishing. Link social media accounts for easy sharing. Pros also verify their accounts for that blue checkmark, which builds trust. Verification involves submitting identification and waiting for approval, typically within 48 hours.
Choose a theme for your blog. UploadBlog.com offers free and premium templates. Pick one that’s mobile-responsive, as over 50% of traffic comes from phones. Customize colors, fonts, and layouts to match your brand. Install plugins for added functionality, like analytics trackers or comment moderators.
Finally, set up your domain. While UploadBlog.com provides a subdomain, pros buy a custom one and point it to their uploadblog.com page. This professional touch can improve SEO rankings. Tools like Google Domains integrate seamlessly.
By investing time in setup, you ensure a smooth uploading experience later. Remember, your account is the gateway to professional content creation.

Understanding the Dashboard
The dashboard is the heart of the uploadblog.com page, where all magic happens. After logging in, you’re greeted by an overview panel showing recent posts, stats, and notifications. Familiarize yourself with the sidebar menu: Posts, Media, Pages, Comments, and Settings.
The Posts section is crucial for uploading. Here, you can create new entries or edit existing ones. The editor is WYSIWYG (What You See Is What You Get), allowing real-time previews. Pros use keyboard shortcuts for efficiency—Ctrl+B for bold, Ctrl+I for italics.
Media library stores all uploaded files. Organize them into folders for easy access. Dashboard analytics provide insights like visitor counts, top-performing posts, and traffic sources. Use this data to refine future uploads.
Customization widgets let you add elements like search bars or recent posts to your sidebar. For pros, integrating SEO tools directly into the dashboard is a game-changer. Plugins like Yoast analogs on UploadBlog.com analyze content in real-time.
Don’t overlook the draft feature. Save work in progress and collaborate if you’re on a team plan. The dashboard’s search function helps locate old content quickly.
Mastering this hub ensures efficient navigation, saving time for actual creation.
Preparing Your Content for Upload
Quality content starts before hitting the upload button on the uploadblog.com page. Brainstorm ideas based on trends—use tools like Google Trends to find hot topics. Outline your post: introduction, body, conclusion.
Write engaging headlines. Pros craft titles that are clickable yet descriptive, under 60 characters for SEO. Body content should be scannable—use short paragraphs, bullet points, and subheadings.
Incorporate multimedia. Prepare images at 72 DPI for web optimization, videos under 100MB for quick loads. Alt text is essential for accessibility and SEO.
Research keywords. For UploadBlog.com, integrate terms naturally. Ensure originality—run through plagiarism checkers.
Edit ruthlessly. Check grammar with tools like Grammarly. Read aloud for flow. Get feedback if possible.
Format for readability: bold key phrases, italicize quotes. Use lists:
- Bullet for tips
- Numbered for steps
This preparation phase turns good content into pro-level uploads.

The Uploading Process Step by Step
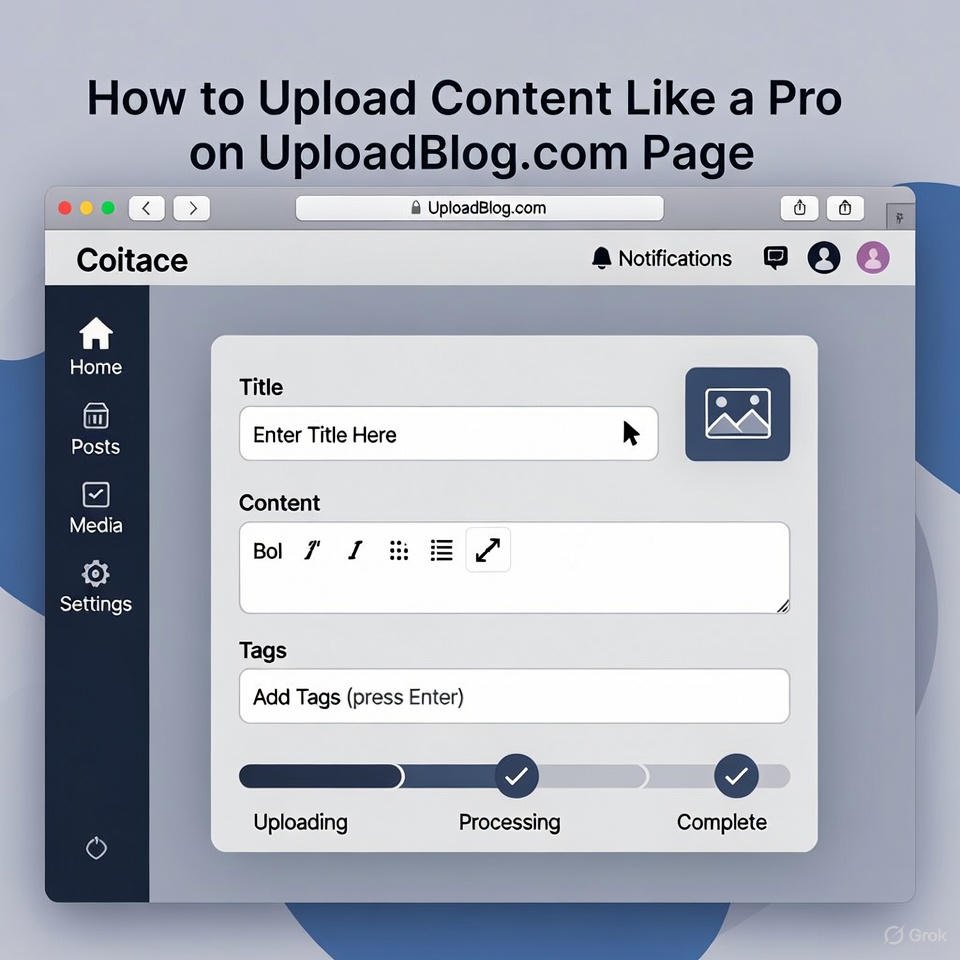
Now, the core: uploading like a pro. Log into the uploadblog.com page and navigate to “New Post.”
Enter your title. Below, the editor awaits. Paste or type your content. Use blocks for versatility—text, image, video blocks.
To add media, click the “+” icon and select “Image” or “Video.” Upload from your device or URL. Pros optimize files first: compress images with TinyPNG, trim videos.
Embed elements: for YouTube, paste the link; it auto-embeds. Add galleries for multiple images.
SEO optimization: In the sidebar, fill meta title, description. Add focus keywords. Categorize and tag your post.
Schedule or publish. Pros schedule for peak times, like mornings for business audiences.
After upload, preview on different devices. Fix issues immediately.
Advanced: Use custom HTML for unique layouts. Integrate forms or polls for interaction.
Troubleshooting: If upload fails, check file size or internet. UploadBlog.com support is responsive.
Following these steps ensures flawless uploads every time.
Optimization Tips for Maximum Reach
Uploading is half the battle; optimization seals the deal on the uploadblog.com page. Focus on SEO: internal links to other posts, external to authoritative sites.
Mobile optimization: Ensure responsive design. Test with Google’s Mobile-Friendly tool.
Speed matters: Compress assets, enable caching via plugins.
Engagement boosters: End with calls-to-action, like “Comment below!” Moderate comments to foster community.
Analytics review: Post-upload, monitor performance. Adjust based on bounce rates.
A/B testing: Upload variations of titles or images, see what performs better.
Security: Watermark images, use HTTPS.
These tips transform standard uploads into pro strategies.

Promoting Your Content Effectively
Once uploaded, promotion amplifies reach. Share on social media: Twitter, Facebook, LinkedIn. Tailor teasers for each platform.
Email newsletters: Build a list on UploadBlog.com and send updates.
Collaborate: Guest post or co-create with others.
Paid ads: Use Facebook Ads targeting your niche.
Forums and communities: Share links on Reddit, Quora without spamming.
Track referrals: See where traffic comes from, double down there.
Consistent promotion turns one-time visitors into loyal readers.

FAQ
Here are some frequently asked questions about uploading on UploadBlog.com:
Q: How do I recover a deleted post? A: Go to the trash folder in the dashboard and restore it within 30 days.
Q: Can I upload large files? A: Yes, but compress them first; limits are 500MB per file.
Q: Is there a mobile app? A: UploadBlog.com has apps for iOS and Android for on-the-go uploads.
Q: How to monetize my blog? A: Integrate ads via plugins or affiliate links.
Q: What if my upload fails? A: Check connection, file format, or contact support.


